How is the Samyang 14mm going?

So I have had the Samyang for more than a while now, and I thought I’d give some more feedback. Firstly I must say this lens is SUPER sharp, at f5.6 it is incredible.

What I am finding however is that the distortion plug-in for Adobe Lightroom is not perfect, and I’m still left with a little distortion which is a little bit frustrating. Probably more me looking for the issue, knowing it’s there. However it would not be easily seen in most shots.

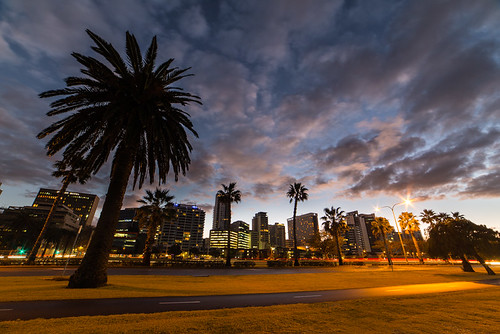
I am finding the fixed hood and no front thread very frustrating, and I long to use my ND grads and variable ND filter. To that end the Canon 14mm or any other brand at 14mm would have the same issues, so I think it still warrants having a 17-40mm or 16-35mm lens as well, maybe even a 20mm f2.8. I have managed to salvage most shots where an ND Grad would have been useful, like this one I took recently in Perth.

Still, I can’t complain given the cost…

The Hazards

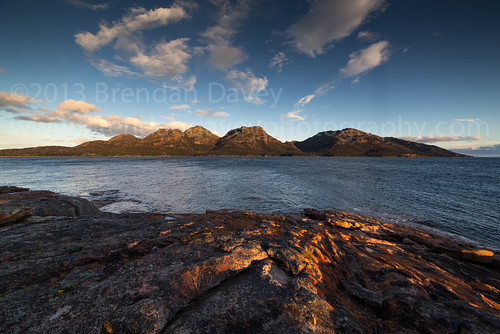
Just a quick share of the Hazards Mt Range, Freycinet National Park, Tasmania. (Mt Parsons, Mt Baudin, Mt Dove, Mt Amos & Mt Mayson).

This shot was taken from Coles Bay. It was a fairly uneventful sunset, and it had been cloudy and raining all day. It did manage to clear out for just a few hours when I took this picture. I would have really liked to have used a 10 stop filter, but the 14mm lens I was using is hooded, and has no front thread 🙁

14mm Samyang f2.8

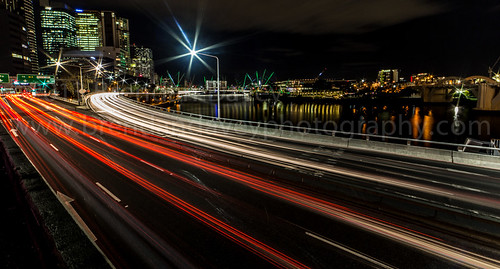
Brisbane CDB by Brendan Davey
Brisbane CDB, a photo by Brendan Davey on Flickr.

I’ve been using the 14mm Samyang for a while now, and I must admit it’s a very good lens, very sharp. I’ve noticed on occasion that it is susceptible to lens flares, but nothing too bad considering it’s 14mm.

Using the Abode lens profile downloader I’ve managed to get a reasonable lens profile for use with Lightroom 4.4 and it’s fixed most of the vignetting and distortion.

It’s totally manual, which for landscape photography is perfect, since you normally spend the extra time to setup your shot and check focus using live view anyway.

If your considering buying one, then go for it, it’s well worth the money, or lack there off when compared to the brand equivalent.

Long Exposures, Tripods and IS (VR).

South Arm Beach by Brendan Davey
South Arm Beach, a photo by Brendan Davey on Flickr.

Should you use your IS (VR) lens on a tripod with the IS turned on to improve your shots? Do I need an IS (VR) lends for tripod long exposure work? Does it help at all?

NO, NO and NO!

“The IS mechanism operates by correcting shake. When there is no shake, or when the level of shake is below the threshold of the system’s detection capability, use of the IS feature may actually *add* unwanted blur to the photograph, therefore you should shut it off in this situation. Remember that the IS lens group is normally locked into place. When the IS function is active, the IS lens group is unlocked so it can be moved by the electromagnetic coil surrounding the elements. When there’s not enough motion for the IS system to detect, the result can sometimes be a sort of electronic ‘feedback loop,’ somewhat analogous to the ringing noise of an audio feedback loop we’re all familiar with. As a result, the IS lens group might move while the lens is on a tripod, unless the IS function is switched off and the IS lens group is locked into place.” -Chuck Westfall (Canon).

It’s true that newer lens will automatically disable the IS if they detect no movement, but the bottom line is to be safe and switch it off for tripod work, and if someone recommends an IS lens for low light tripod work, don’t believe them. This may be why the wide angle lens traditionally used for landscape work still do not have IS (16-35, 17-40, 24mm, 14mm etc).

Night Focus, Easy As….

Okay so we have all sat in the picture theater and thought “Focus FOCUS”, and maybe recently you started to shoot at night only to find your camera was not up to the task.

“Yer, my camera won’t focus, so how do you focus to infinity at night?”

Most cameras are not designed to focus in extreme low light, and will require manual intervention, switch the lens from Auto to Manual focus mode.

“Ok, so my lens is now in manual mode and I set the focus to infinity but it’s still blurry?”

This is normally the case as the infinity mark is almost never perfect, think of it like the pirate code, that is more a “guide”.

“You mean I can’t focus at all at night?”

There are a number of ways to get perfect focus in the dark, here are the 2 easiest.

1. If your camera supports live view use it. Set you lens to manual focus, and focus to infinity, then using live view and zoom (normally 10x) you should be able to locate a distant light on the horizon or bright star you can adjust the focus on to get it perfect. This will require some practice and stars or faint objects may only work on better / later model cameras and lens with larger apertures like f2.8 and lower.

2. If your camera does not have live view then during the DAY have your camera focus on a distant object in auto focus mode (something on the horizon), then looking at your lens note where the focus mark is, it should be near infinity, but it probably wont be exactly on it. Take note of the location, or place some masking tape next to the mark and mark it with pen so you can manually move the focus back to this spot later. Repeat this a few times to confirm the mark. Now at night set your lens to manual focus and move the focus to your recorded mark. This method is not as good as the one above as lenses have a little bit of “play” or tolerance, but it should be more than good enough for infinity focus.

There you have it two ways to get perfect focus in the dark. – Cheers.