I have just added the Canon 5Ds and 5Dsr samples for long exposure base sensor noise to the long exposure list.
How did it go? find out here..
I have just added the Canon 5Ds and 5Dsr samples for long exposure base sensor noise to the long exposure list.
How did it go? find out here..
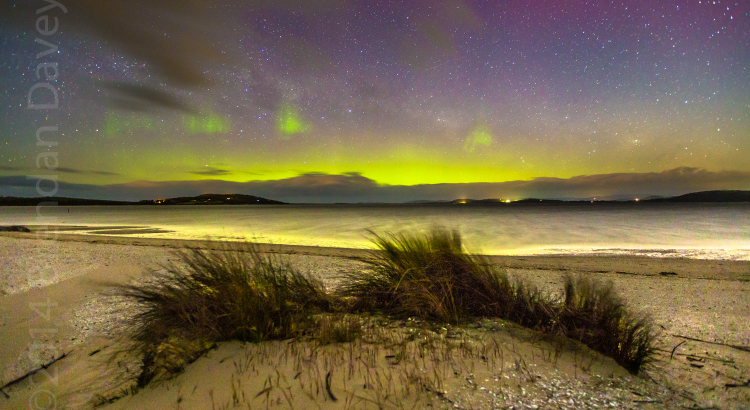
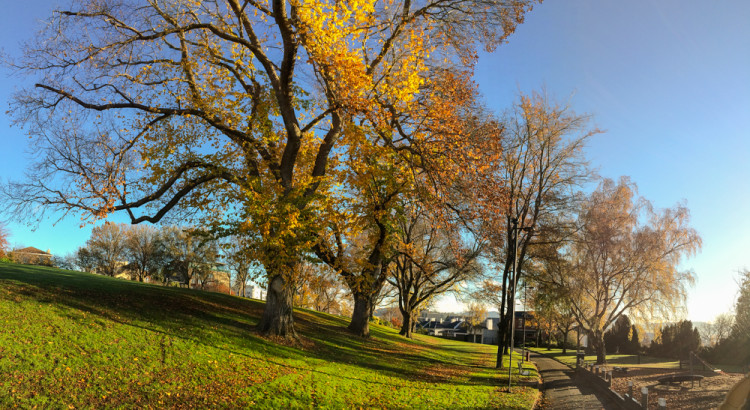
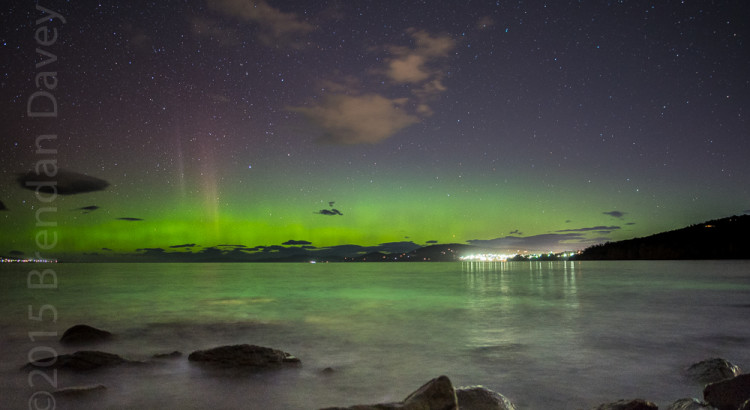
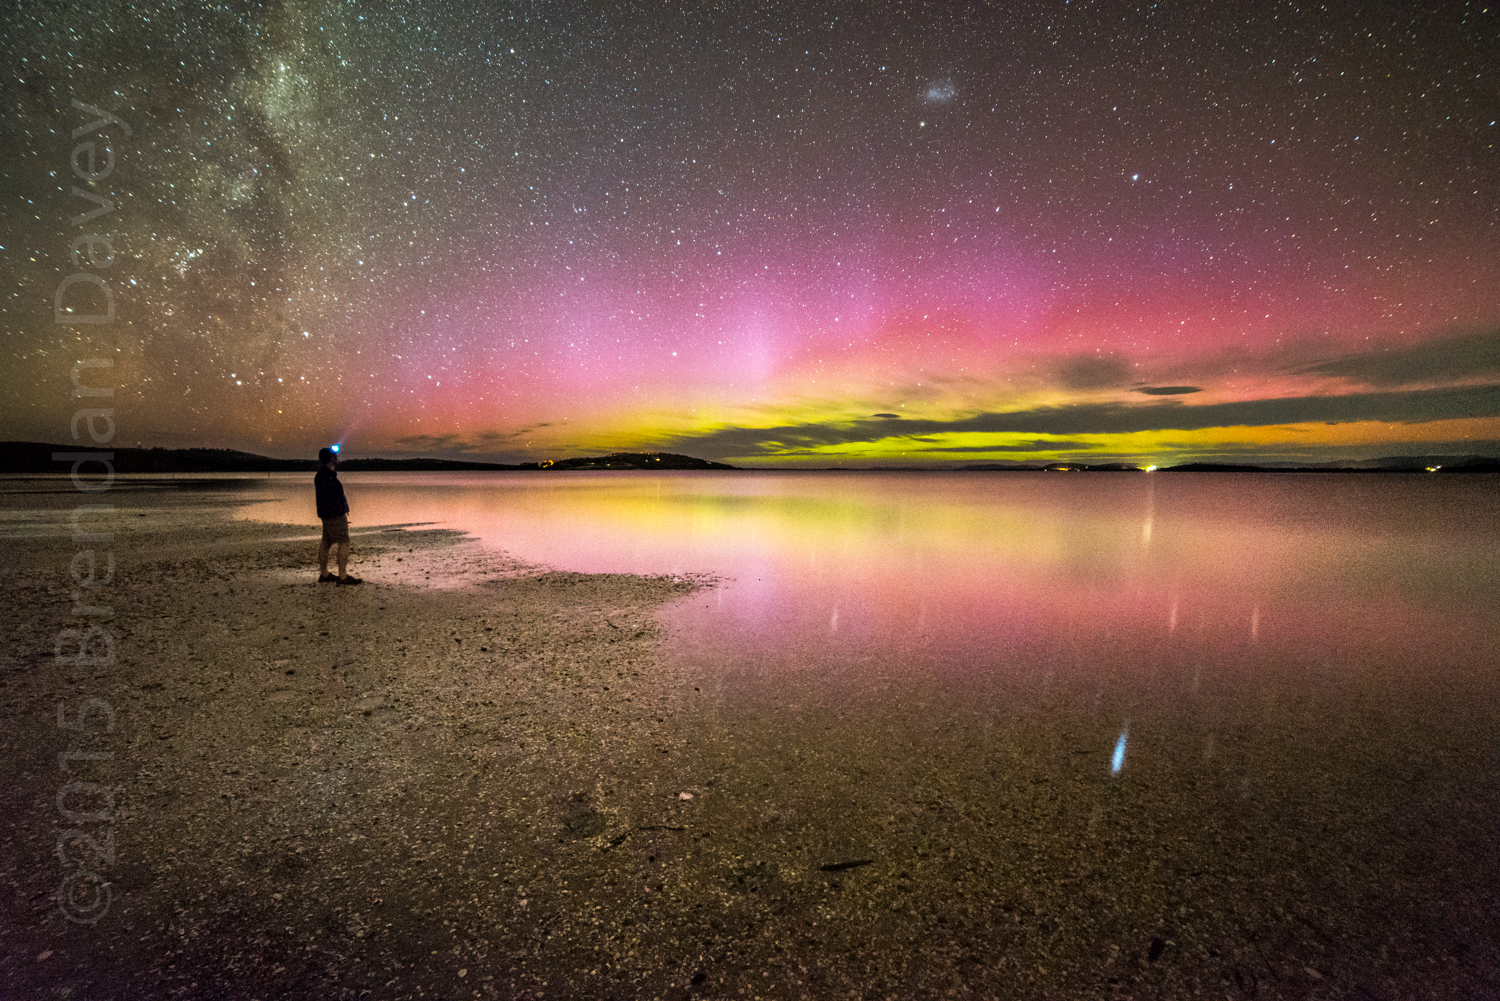
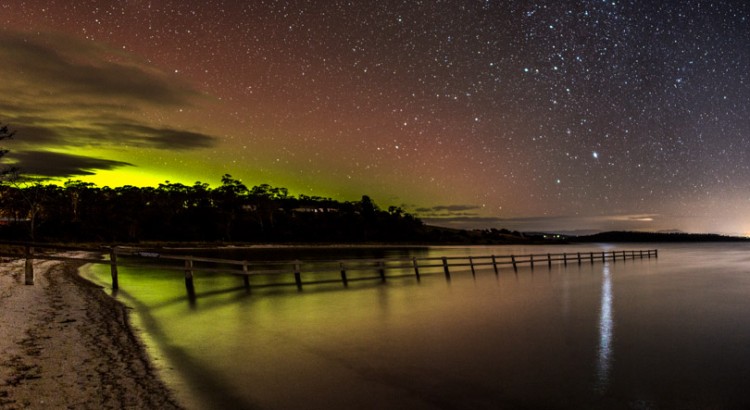
The other night I was out shooting an Aurora with a friend of mine, and we were discussing what can make or break a shot. What is it about some scenes that make a photograph popular?
To be honest the Aurora Australis is not all that hard to shoot, you join a Facebook page, find out when the actions happening and the weather is clear, then go out and setup your camera pointing south with the settings everyone is willing to freely give you. The result? Well we have all seen them, the countless shots from decks and backyards.
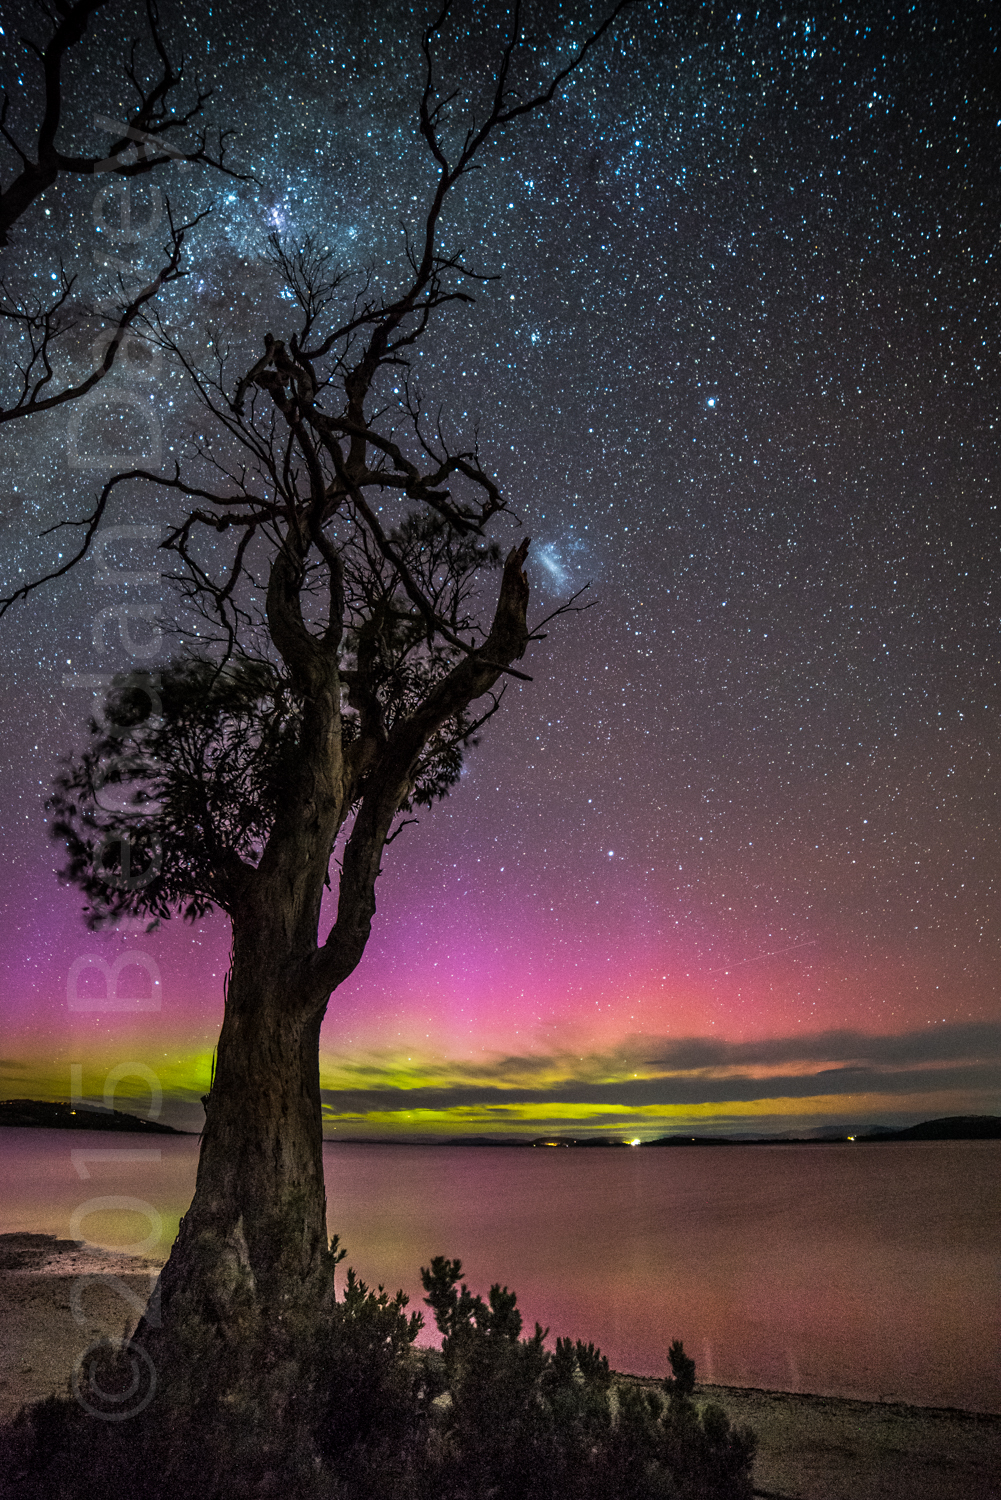
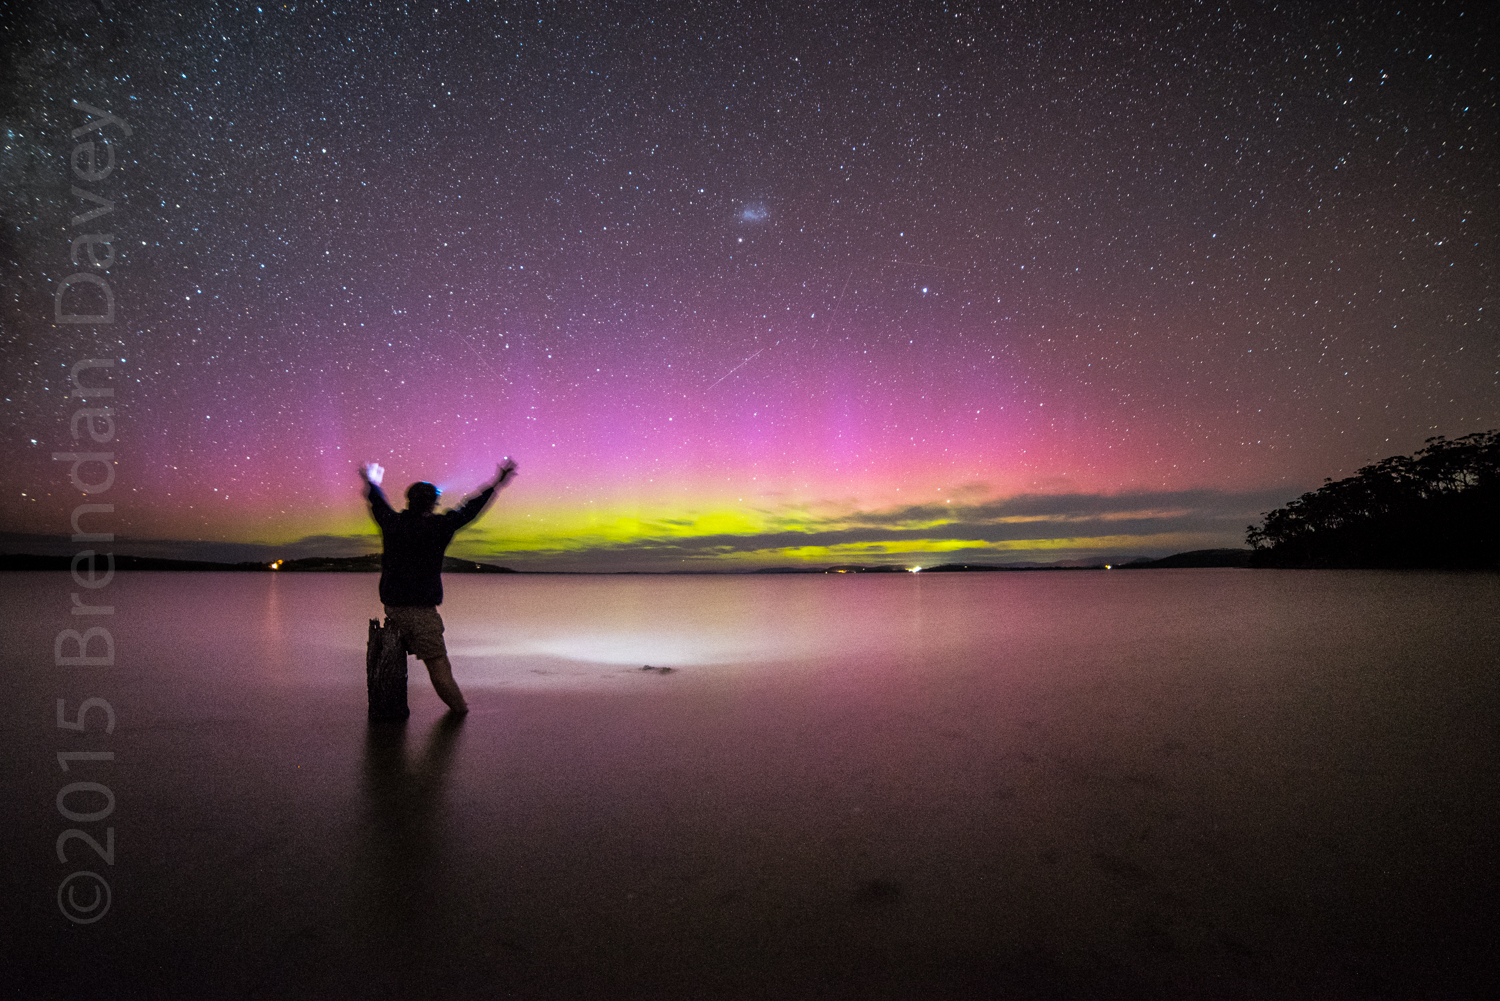
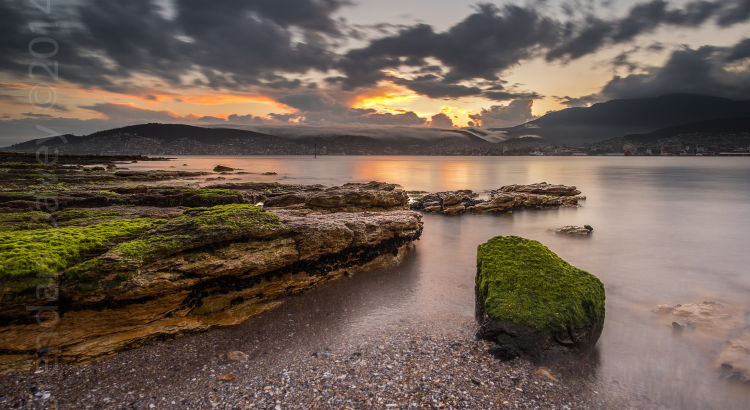
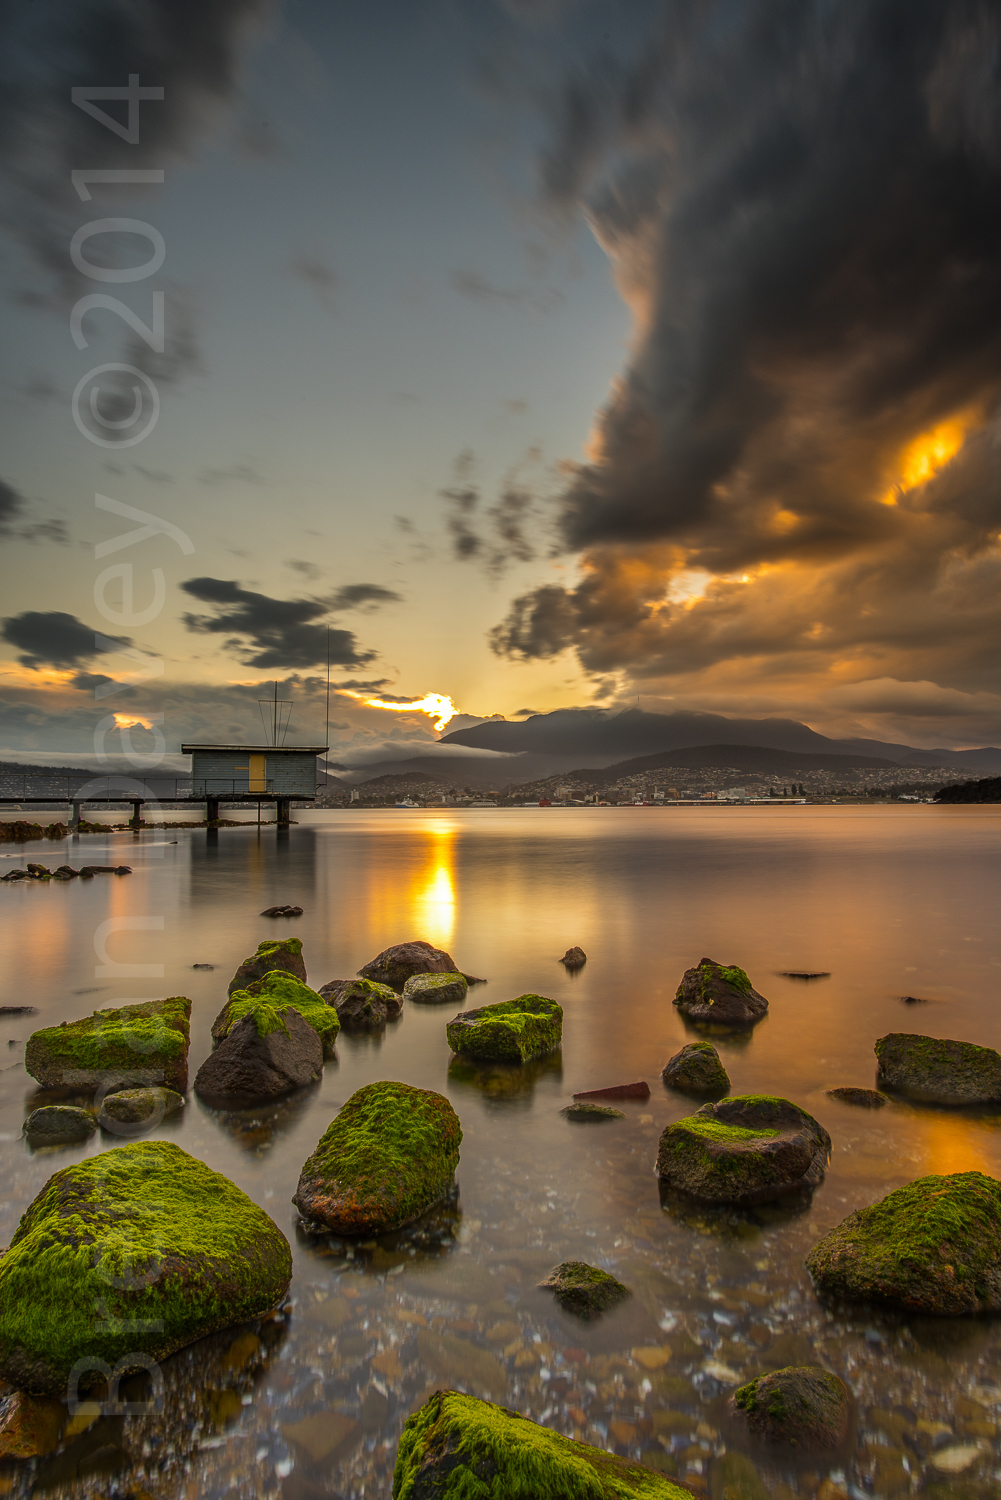
 So, what am I waffling on about? Imagination, creativity, beauty and effort. Yes, effort. A good shot does not happen when you drive into a carpark and proceed to setup your camera next to your car. A good shot takes research, framing and most importantly good subject matter. A good Aurora is not good enough by itself (yes there are exceptions to the rule), a good shot draws you in on many layers, first it may be the Aurora, but then your eyes start to wander as you look at the other subject matter and composition.
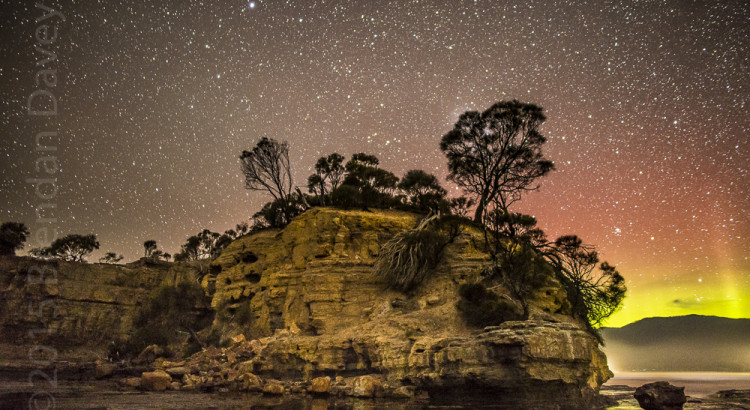
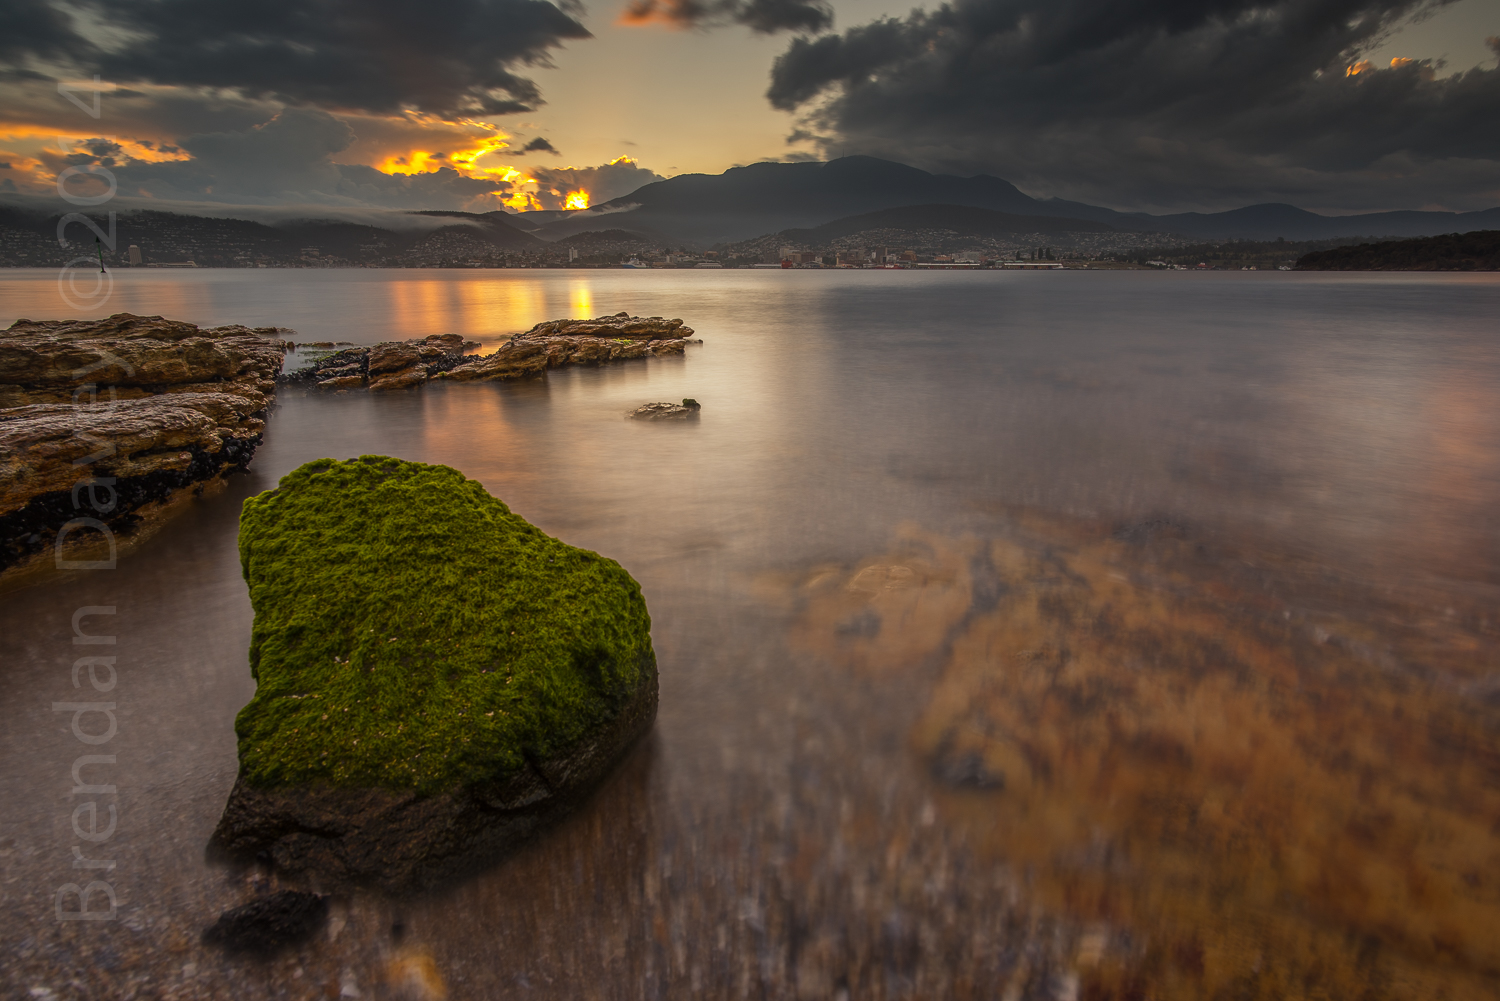
It’s very important to make sure your shot is level, and you use the proven framing techniques, and that the rest of the shot enhances the main subject matter, in the case of an Aurora maybe it’s reflections on water, interesting foreground subject matter or some lovely rolling hills. Also, try to avoid to much subject matter drawing your else away from the central theme, or bad subject matter.
Anyone can shoot a car, anyone can even shoot a nice expensive and exotic car, but it’s never going to look nice unless you place the car in surroundings that enhance the feat ures of the car, and of course, shot in a way that enhances the cars features.
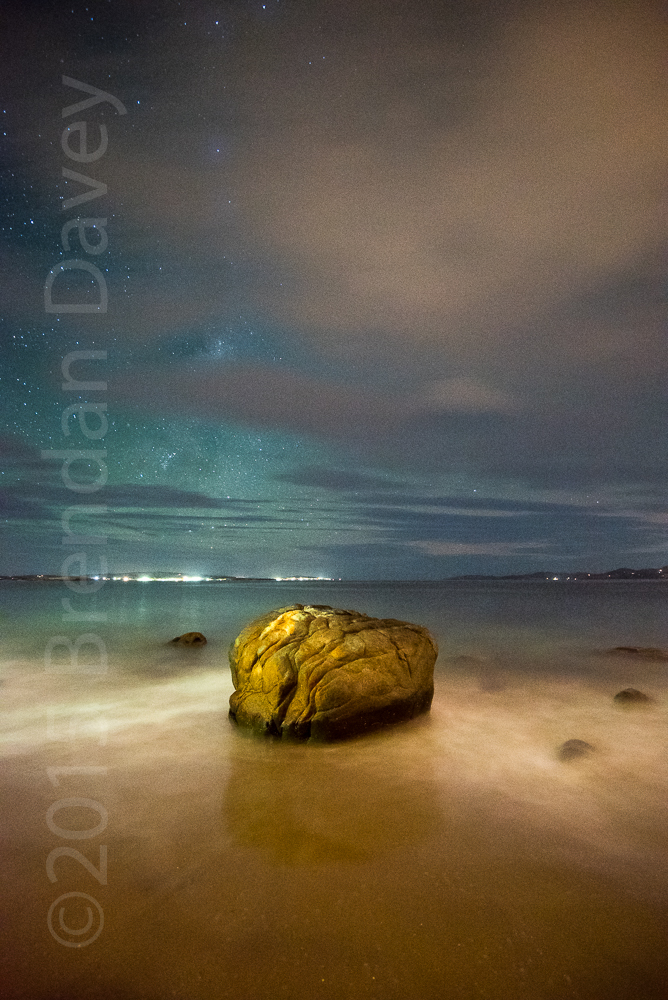
In the days before digital cameras you knew you only had one, maybe two rolls of film for a shoot, consequently much more time was spent on planning and setting up shots. Today there seems to be this idea that quantity is going to make up for quality. Sometimes I may only shoot 6 pictures, and at most I generally never go over 50.
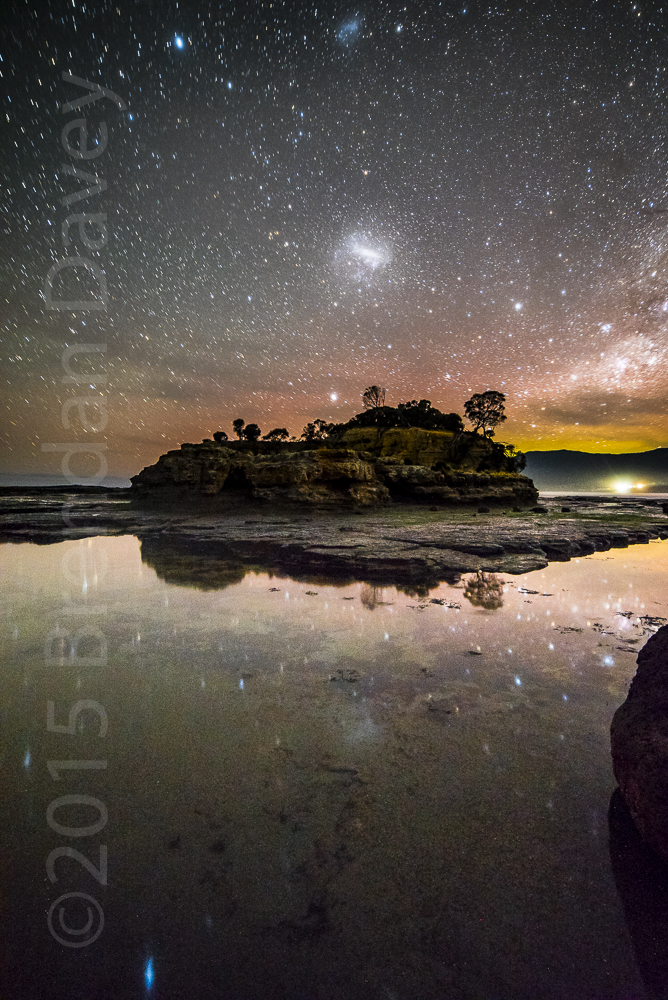
The best shots are always the ones that have been researched, pondered upon, then with the subject matter framed correctly.
Could you go out and ONLY take 24 different shots?
I’m a big fan of Adobe Lightroom, it’s a great way to catalog your photos, and I’ve been using it for quite a few years now, and it’s now my primary editing environment.
So Adobe have recently released version 6, admittedly I handed over my money and upgraded without actually checking what benefits I would be getting other than now being supported for the v6.x product cycle. After using version 6 for a few days I’m still scratching my head wondering what extras or enhancements I have gotten for my money.
Sure it has HDR and Panorama now inbuilt, and they seem to work quite well, but if you have Photoshop they are not really required and they are included in 5.7.1 Build 991162 (According to Adobe). Performance increase? Umm OK, if you say so. It’s hard to notice any performance difference on a late model PC with lots of RAM and an SSD. The only enhancement I may possibly use is the brush tool in conjunction with the graduated filtering (which was possible in the older version). It may have other new features like face recognition and advanced slide shows but I don’t think they are going to appeal to many photographers, especially those who specialize in landscapes or shoot more than their family and friends.
Did I mention that 5.7.1 Build 991162 has these new features? So I’m still wondering what did I just pay for?
I can’t help but feel a little bit ripped off especially when features that everyone wants and are crying out for (and 3rd parties are making money from) are still missing, such as the ability to find and delete duplicates within the catalog.
If you have a late model PC and Photoshop then you my want to just update to 5.7.1 rather than paying the $100 upgrade to 6. At this stage, in my opinion there is very little benefit to move. Save your money at least for the time being.
If you have an older system (but still 64 Bit) and/or no Photoshop then it may be worth the upgrade to give you a little more speed or the added benefit of HDR imaging and Panorama merging (5.7.1 Build 991162+ also has these features), if that’s of interest to you, particularly if you are coming for Light room 4.X
I don’t use Creative Cloud (CC), but if you get a free upgrade from 5 to 6 as part of your subscription then bonus 🙂
***UPDATE***
I have updated 5.7 to 5.7.1 and I can not see the HDR or merging features, even though Adobe advertised them as new features in 5.7.1….. It could be a CC only option, if anyhow has a CC subscription and HDR/Merge works, please let me know.
 Shooting the night sky can be one of the most demanding tasks your camera will undertake. It normally involves long exposures, high ISO settings, and having to deal with a variety of lighting challenges, both natural and artificial.
White balance (WB) can not only vary a lot from shot to shot, but also from manufacturer to manufacturer. It’s well known that Nikon for example has a Blue bias, where as Canon has a Yellow/Red bias. What if there a clouds?, reflected city lights?, the Moon?, an Aurora?, the list is almost endless.
Most cameras do a very good job, but rarely nail it, as they are simply not build for these extreme scenario and all it’s complexities. Or maybe the auto WB was not what you had in mind for the shot. So here are a few secrets you can use to help get the WB just the way you like it.
If you don’t use post production editing like Lightroom then you should set the WB on your camera manually. To do this set your WB in Kelvin (K) in your camera settings, most DSLR’s support this. Around 4000K is a good starting point for night shots. A little trial and error either side of 4000K should get you something you are happy with. This is very important if you are shooting JPEG images only.
If you shoot in RAW or plan to do some post editing, then setting the WB on the camera is really only useful for viewing on the camera, and to assist with exposure, since it can be changed during the post process. For this reason I personally just leave it as ‘auto’ on the camera (mainly so I’m ready to shoot next time I pick it up where the light may be different).
If you shoot in RAW there are a number of options available to you during post processing. You can either leave it ‘As Shot’, in which case the software will assume the camera was correct, and not alter it, or you can select ‘Auto’ within the software, where the software will determine the best WB based on the scene, or you can set the WB manually. Each of these options can give a different look. I personally prefer a nice grey sky, so I normally have to manually set the WB.
Settings the White Balance Manually.
 If you use a calibrated monitor and you have a good eye for colour you can set the WB to your liking easily enough in most applications. Again around 4000K is a good starting point, and experimenting from there.
I personally prefer to sample a portion of the image to determine the WB of best fit. In the case of Lightroom the Eye Dropper tool in the ‘Basic’ panel can be used to set WB. The secret to using the Eye Dropper Tool is to try and select an area of the image where it would be a neutral grey, in the case of most night photography this would be anywhere between the stars, I try to select a section from the top left or right of the image, where I am sure it would be close to grey.
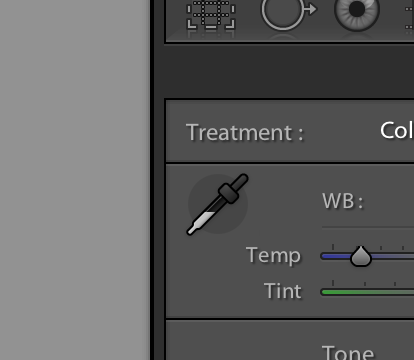 Moving the eye dropper around and viewing the preview panel will give you an idea of the final result. A little trial and error may be required.
Below is an example showing the bias from each method. Left to right we see Manual WB, notice the neutral grey Sky and stars. In the middle we have ‘As Shot’, in this case ‘auto’ WB set on the Camera (D750), note the blue sky, and to the right we have a WB somewhere in-between where the lightroom ‘Auto’ settings has slightly corrected the camera’s Auto WB.
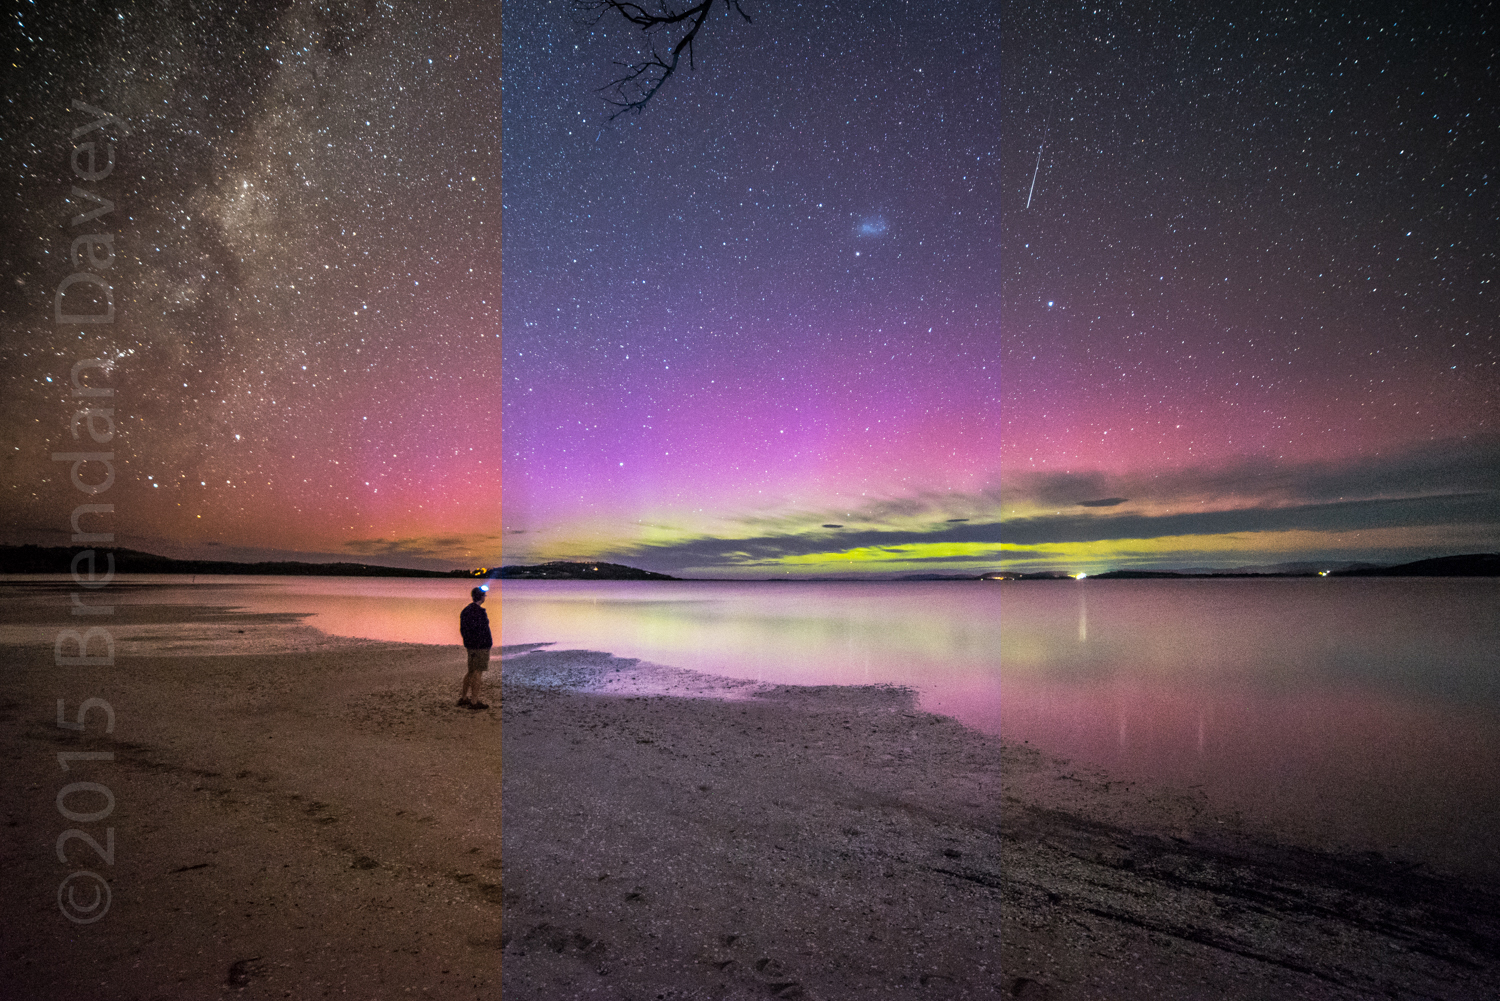
And remember WB is subjective, so there is no perfect setting, some prefer the Blue sky. 🙂
I’ve been using the D750 for about 4 months now, so it’s time for an update.
I’m now very used to the controls and can quickly change ISO, exposure compensation and other additional functions with ease, I do however find that the D750 is not as ergonomically nice at the Canon bodies, primarily because I have big hands and use a single handgrip strap, which makes moving the rear thumb dial particularly quite tricky at times. Aside from this small issue it has been a joy to use.
During the last 4 months I have also had time to go out and do a fair bit of shooting in low light, and I can confirm that the sensor performs as well as it did during my testing and the level of noise (or lack there of) out of the camera is outstanding, I also find that the noise that is produced is a much nicer looking noise than that of the Canon 5Dm3 or 6D. The noise is so low that Lightroom applies no Luminance NR at all by default.
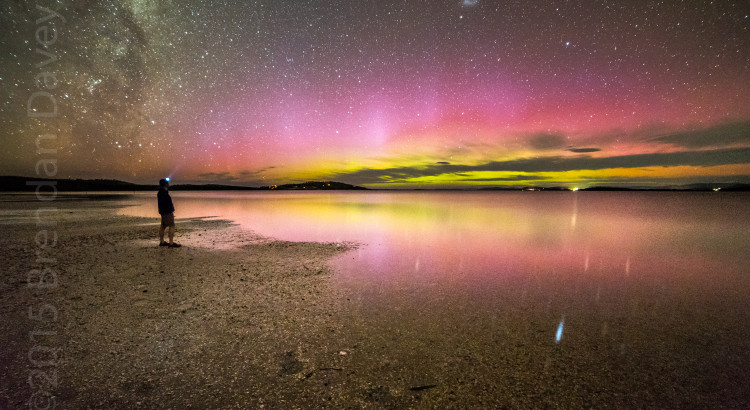
Here are some samples for you to enjoy, please note that some NR has been applied in Lightroom to suit the style of the shot. It’s worth noting the shots 3 and 4 as they have been shot with the highest ISO and had the least NR applied.
3200 ISO, 51 Sec. (LR Lum NR 50).
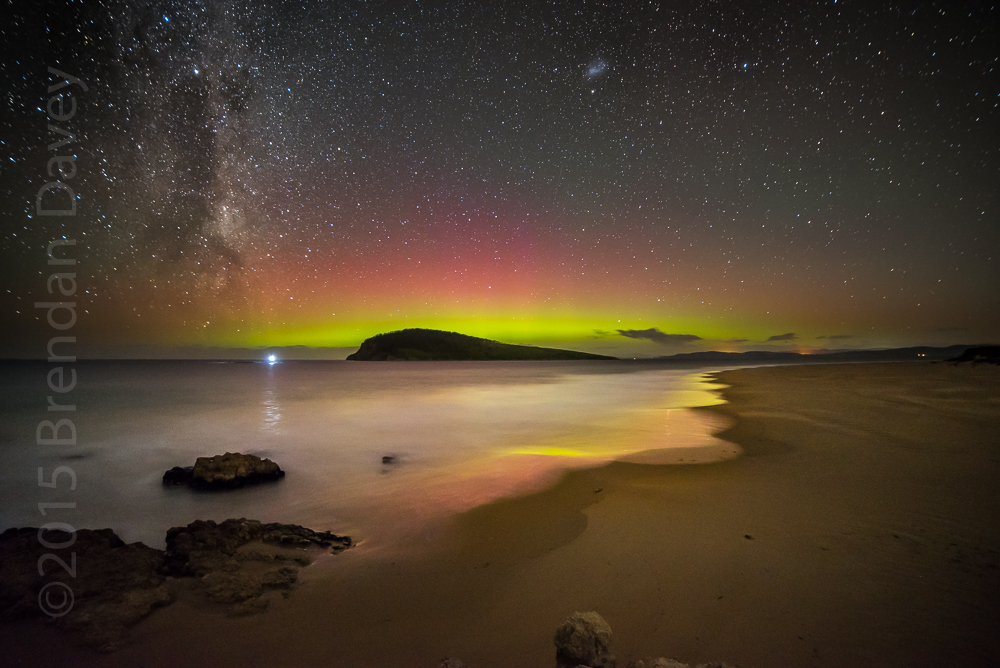
6400 ISO, 30 Sec (LR Lum NR 25)
ISO 12800, 28 Sec, (LR Lum NR 15)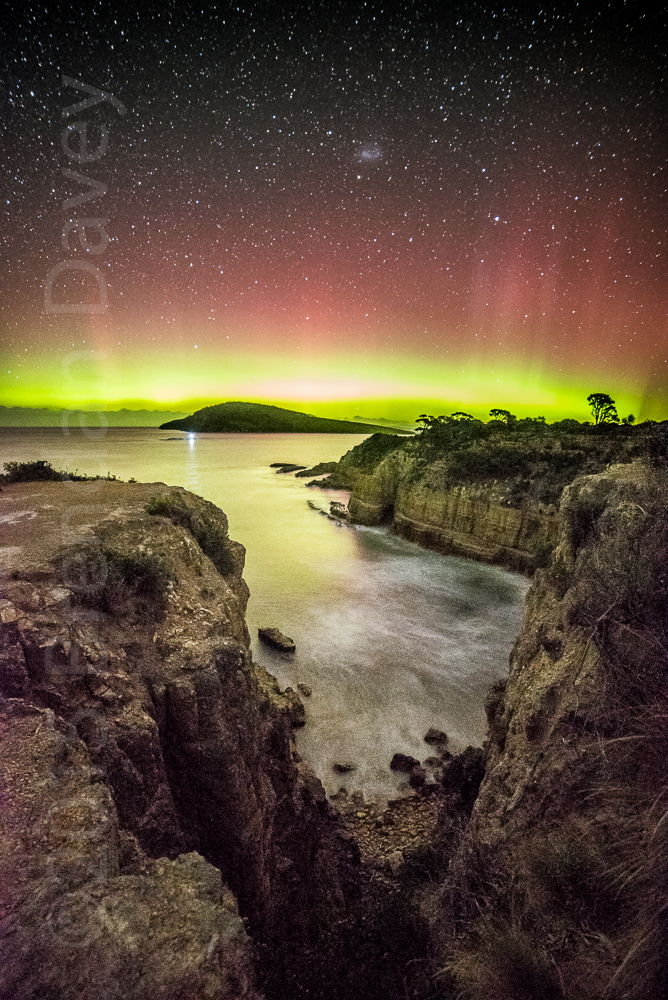
ISO 12800, 30sec (LR Lum NR 20)
The rumor of the Sigma 16-20mm f2 ART lens has been circulating for over a year now, and it’s looking less likely that we will see it, for a number of reasons:
Well, the issues aside I personally would love to see f2 @ 16mm. I admit given it’s likely price tag it will have a very small market, mainly to those that shoot landscapes where there is little light. As a person who regularly shoots the night sky and the Aurora Australis I would love to see this lens.
So Sigma, if your reading this PLEASE produce this lens and if you need someone to test it I’m here waiting. 🙂 I’d be more than happy to shoot the southern sky and tell of it’s greatness; because lets face it, if it’s going to be an ART lens it’s going to be awesome.
A few years ago when I had a Canon 5D mark II, Nikon’s current go to model was the D800; it was the bees knees and I considered making the move. After some testing and comparisons I determined that the D800 still did not have enough to lure me away from Canon, and consequently I purchased a 6D. Primarily because it out performed the 5D mark III in low light, which I still consider to be significantly over priced for what you are getting.
Fast forward Dec 2014. I’ve been sensor testing for quite a while now, watching all the new models arrive, the new Sony A7, the A7R, the Nikon Df, the D4, and most recently the D750. The D750, touted to be successor to the D700 had a lot to live up to, and since I had used a D700 on a number of occasions in the past and being suitably impressed I was keen to see how it performed.
The D750 blew every other model out of the water for long exposures I had tested. From ISO 3200 the detail that could be pulled from out of the shadows was nothing short of outstanding.
“Could I have finally found a replacement for my 6D?”
I’d been patiently waiting for any sign from Canon that a new affordable model was in the works. All the banter at the usual suspects indicated that a new model would likely be a high mega pixel body, and any replacement for the 6D or 5D was a long way off, and most likely expensive for the latter.
So after some extensive research, I jumped, and this time I can safely say all of my previous concerns have been addressed. Using the D750 so far does feel like a true D700 upgrade, Combined with a good prime (20mm f1.8) it takes truly outstanding shots. (Maybe I’m getting better to).
So far I have only ‘tested’ it for night work, as I’m still waiting on the right conditions for an Aurora (Australis), but based on the samples I have produced so far I have a strong feeling some fantastic shots will come out the other end of my normal workflow. I’m a firm believer in ‘Garbage in, Garbage out’ (GIGO), and although the 6D was not garbage, the D750 will have less issues to deal with going into my workflow, allowing me to push images harder to recover more detail without having to deal with a lot of noise.
And of course… the more to the dark sid…err Nikon was not too bad because ‘they have got cookies’ 🙂

Hi All,
Recently Adobe released Camera RAW 8.7 with support for the new Canon 7D mark II. I’d already taken the shots a few weeks ago, but could not process them through my workflow. Now; I can, and I have uploaded the results to the sensor test page.
![]() Because I shoot a lot of aurora’s I have created an Aurora Forecast Service.
Because I shoot a lot of aurora’s I have created an Aurora Forecast Service.
The service gathers all available data from the ACE spacecraft, the GOES’s satellites, as well as local NOAA estimates and presents it to users to assist them by giving them a short aurora forecast. Normally the next hour.
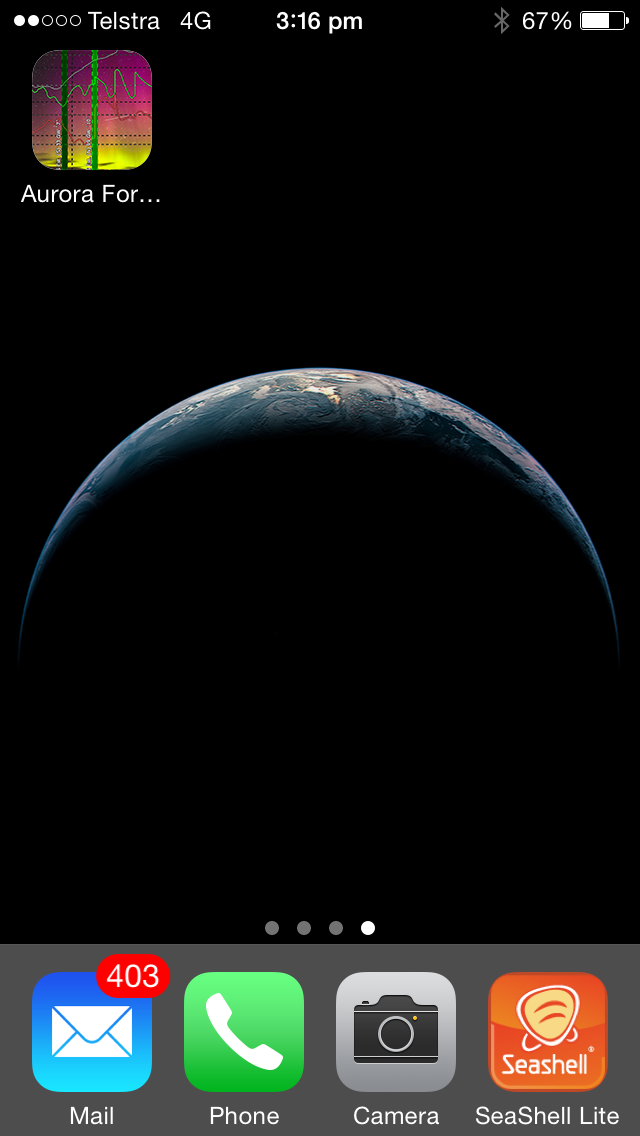 The service is compatible with full screen mode on iOS and android devices, all you need to do is add it to your home screen for future use, and it will remove the pesky Safari URL bar and footer. 🙂
The service also allows you to report sightings of an aurora, which will be visible in real-time to other users of the service.
As well as real-time forecasting you can also view archived dates, include archived reports of aurora’s